66. Previous Week Solution
You can load the full TinyBlog application using the following snippet:
Gofer new
   smalltalkhubUser: 'PharoMooc' project: 'TinyBlog';
   package: 'ConfigurationOfTinyBlog';
   load.
#ConfigurationOfTinyBlog asClass loadFinalApp
To test it, you should launch the Seaside HTTP server. You can now complete or finish your application et commit it in your Smalltalkhub repository.
67. Deploy in the Cloud
Now that you have finished to develop your blog web application, we will see how to deploy it on a server in the cloud.
If you want to deploy your application on your own server, we encourage you to read the last chapter of the book "Enterprise Pharo: a Web Perspective" (http://books.pharo.org).
In this tutorial, we will describe a simpler solution provided by PharoCloud (http://pharocloud.com).
67.1. PharoCloud Hosting
PharoCloud is a hosting service dedicated to Pharo web application that offers a free testing plan (ephemeric cloud subscription).
Set-up your PharoCloud account:
- Create an account on http://pharocloud.com
- Activate your account
- Connect
- Activate your "Ephemeric Cloud" to obtain an API User ID and an API Auth Token
- Click on "Open Cloud Client" and log in using the oabove credentials
- Once connected, you should see a web allowing you to upload an archive file (zip) that should contains two files: a Pharo image and its changes file
67.2. Preparing Pharo image to Deploy on PharoCloud
Currently, PharoCloud only supports Pharo 4 images.
So, download a PharoWeb 4 image. https://ci.inria.fr/pharo-contribution/job/PharoWeb/PHARO=40,VERSION=stable,VM=vm/lastSuccessfulBuild/artifact/PharoWeb.zip. You should also download a virtual machine for Pharo 4 images http://get.pharo.org/vm40. Then, launch this image using this VM and we will configure it.
Let's strat by configuring Seaside by removing all demos applications and all development tools:
	"Seaside Deployment configuration"
	WAAdmin clearAll.
	WAAdmin applicationDefaults removeParent: WADevelopmentConfiguration instance.
	WAFileHandler default: WAFileHandler new.
	WAFileHandler default
		preferenceAt: #fileHandlerListingClass
		put: WAHtmlFileHandlerListing.
	WAAdmin defaultDispatcher
		register: WAFileHandler default
		at: 'files'.
Now, you can load the TinyBlog application:
	"Load TinyBlog"
	Gofer new
	   smalltalkhubUser: 'PharoMooc' project: 'TinyBlog';
	   package: 'ConfigurationOfTinyBlog';
	   load.
	#ConfigurationOfTinyBlog asClass loadFinalApp.

	"Create Demo posts if needed"
	#TBBlog asClass createDemoPosts.
or your application directly from your Smalltalkhub code repository:
	"Load TinyBlog"
	Gofer new
	   smalltalkhubUser: 'XXXX' project: 'TinyBlog';
	   package: 'TinyBlog';
	   load.

	"Create Demo posts if needed"
	#TBBlog asClass createDemoPosts.
We now configure Seaside to use TinyBlog as the default application and we launch the HTTP server.
	"Tell Seaside to use TinyBlog as default app"
	WADispatcher default defaultName: 'TinyBlog'.

	"Start HTTP server"
	ZnZincServerAdaptor startOn: 8080.
You can now save the Pharo image (World Menu > save) and test locally with a web browser on the URL: http://localhost:8080.
67.3. Deploy on Ephemeric Cloud of PharoCloud
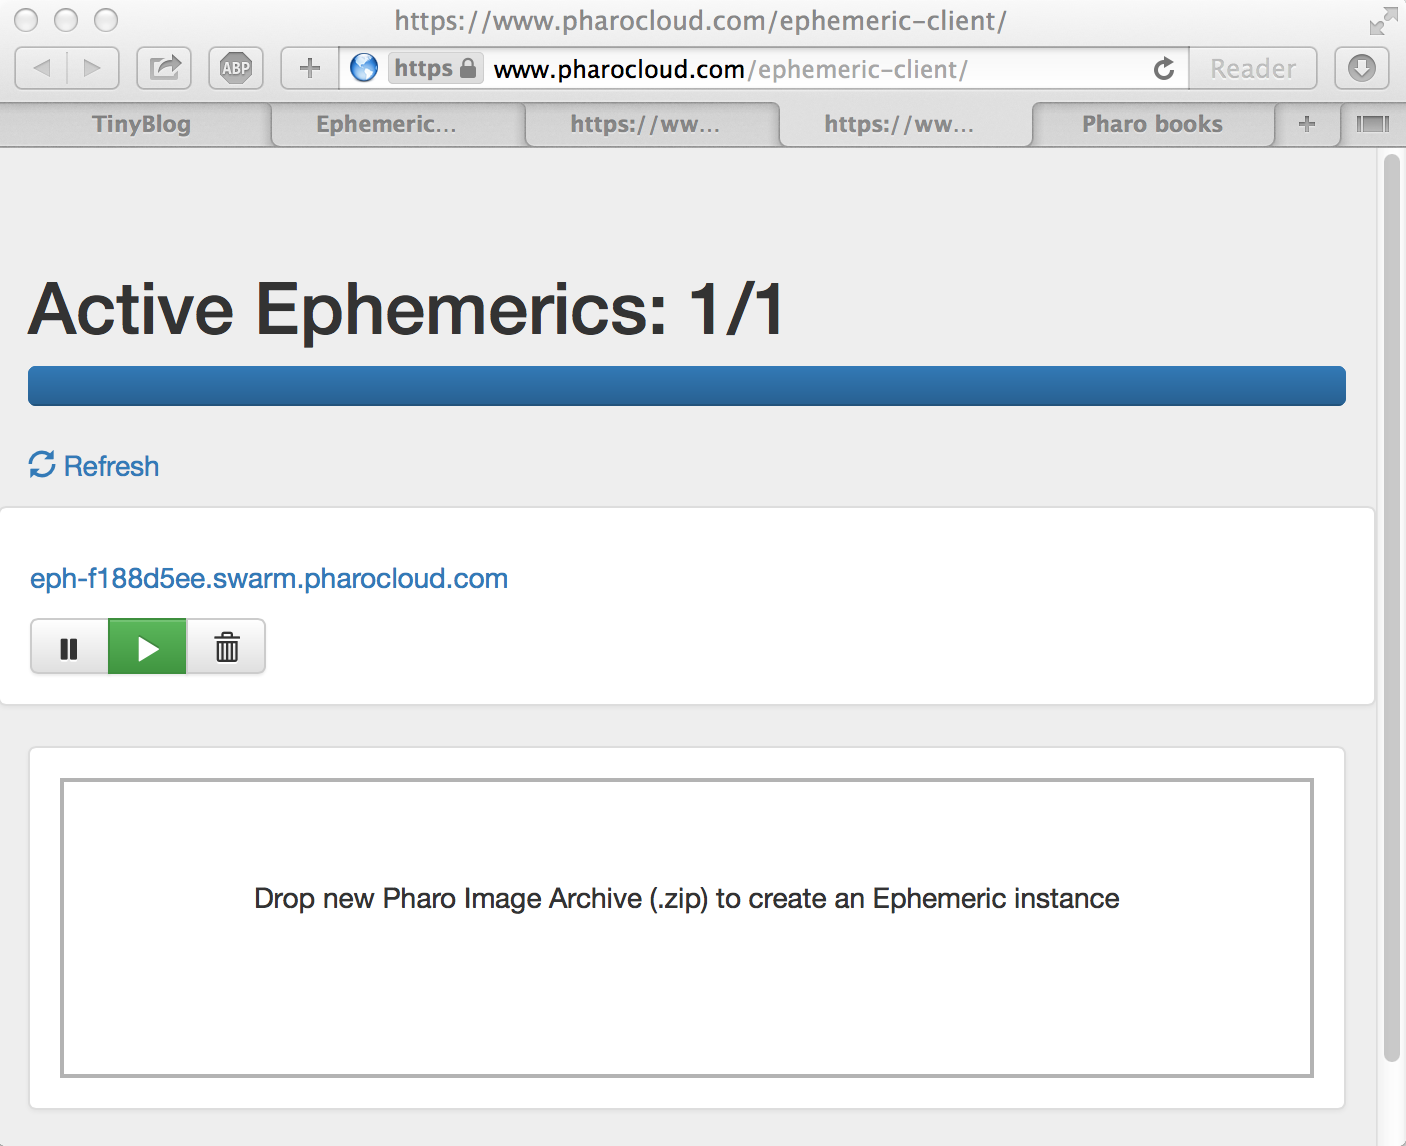
You just need to create and archive (zip file) that contains both the PharoWeb.image and PharoWeb.changes.
Then, drag'n drop this archive file on the Ephemeric Cloud web page and activate this Pharo image (play button) as shown in figure 67.1.
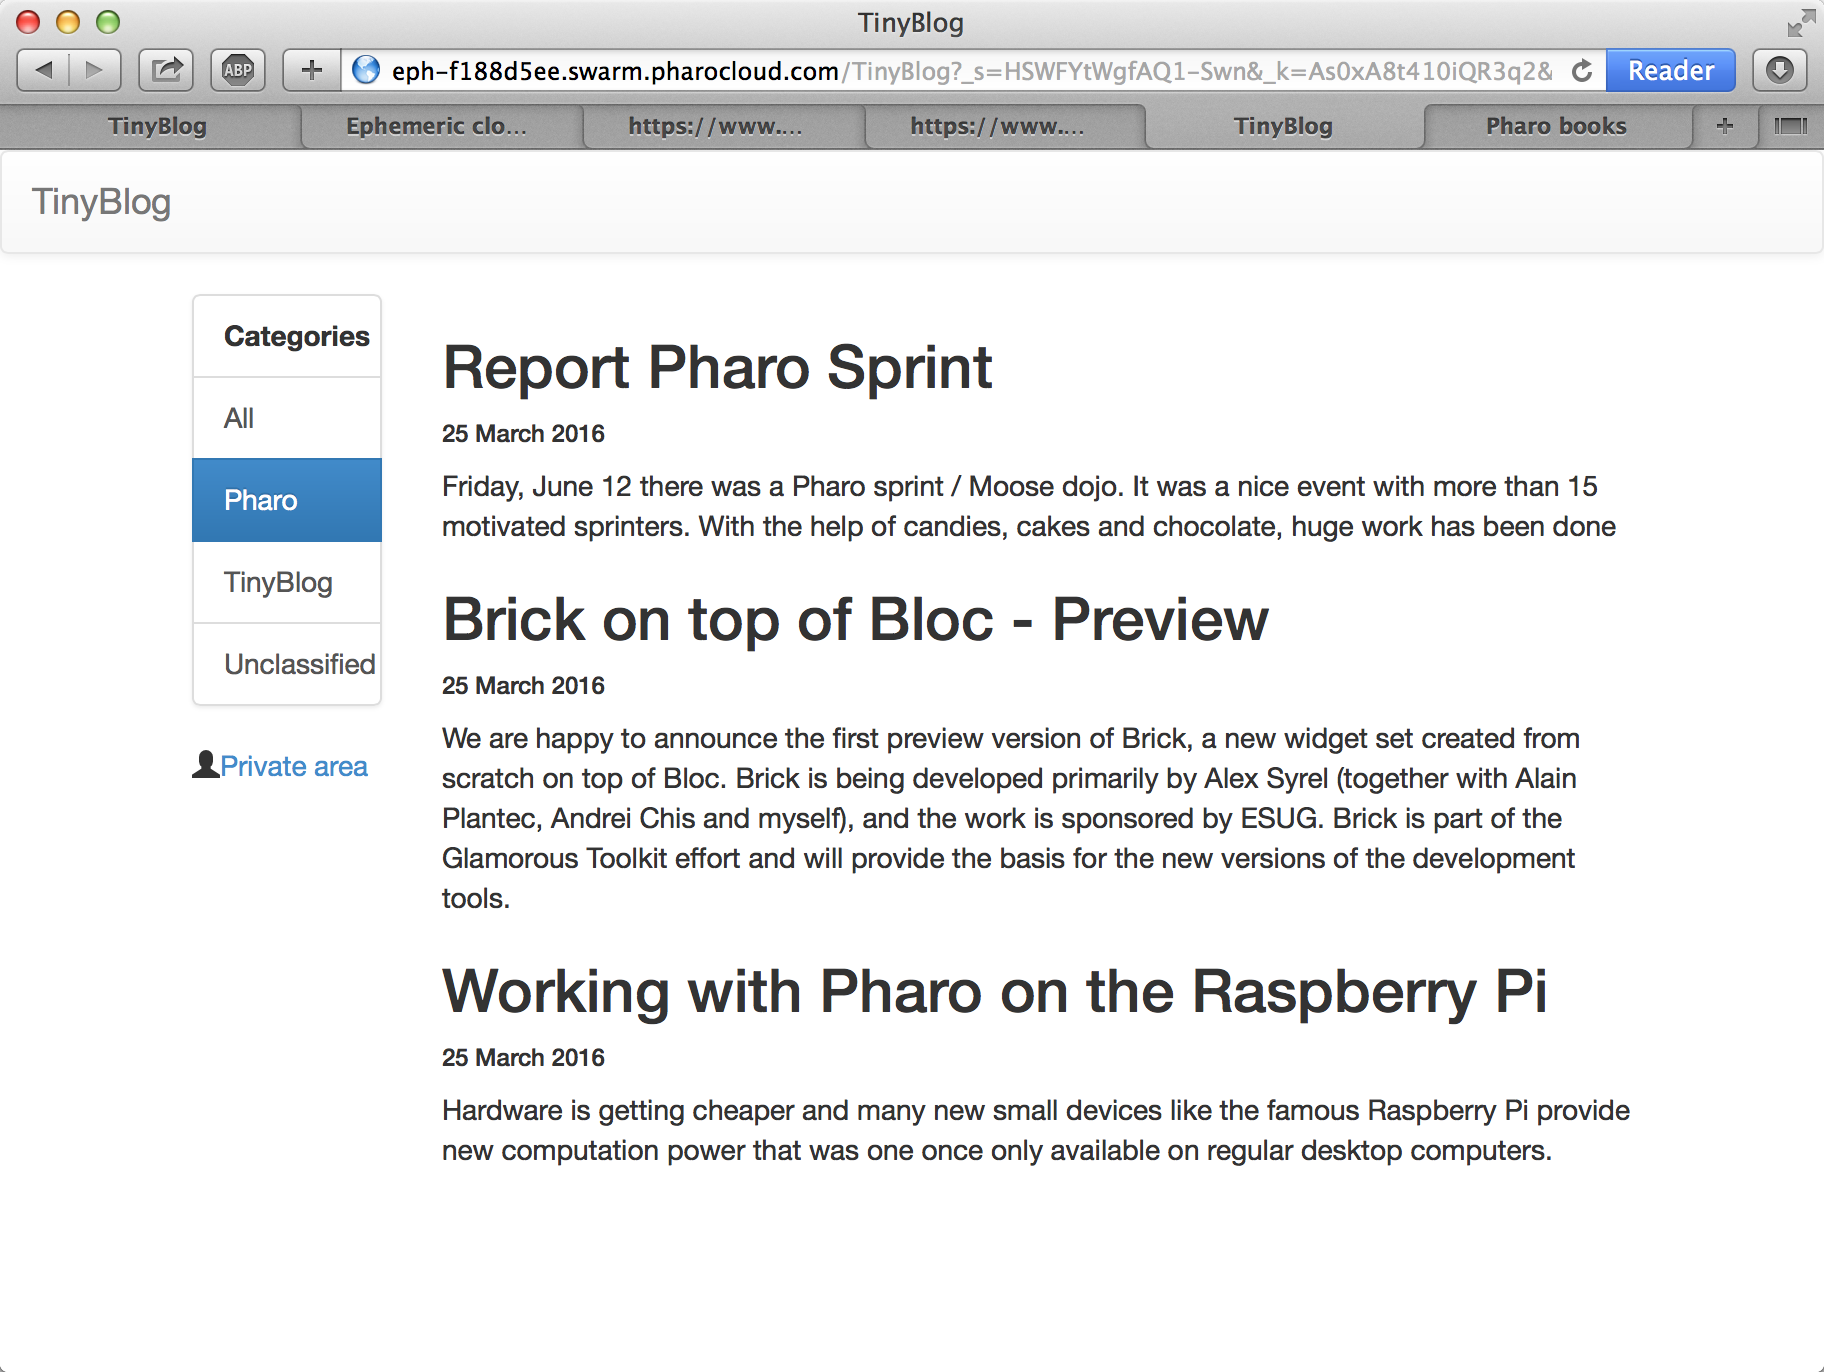
If you clic on the public URL provided Ephemeric Cloud, you should see your web application as displayed on figure 67.2.